Budget Kitchen Makeover: Refresh Your Kitchen Without Spending Much
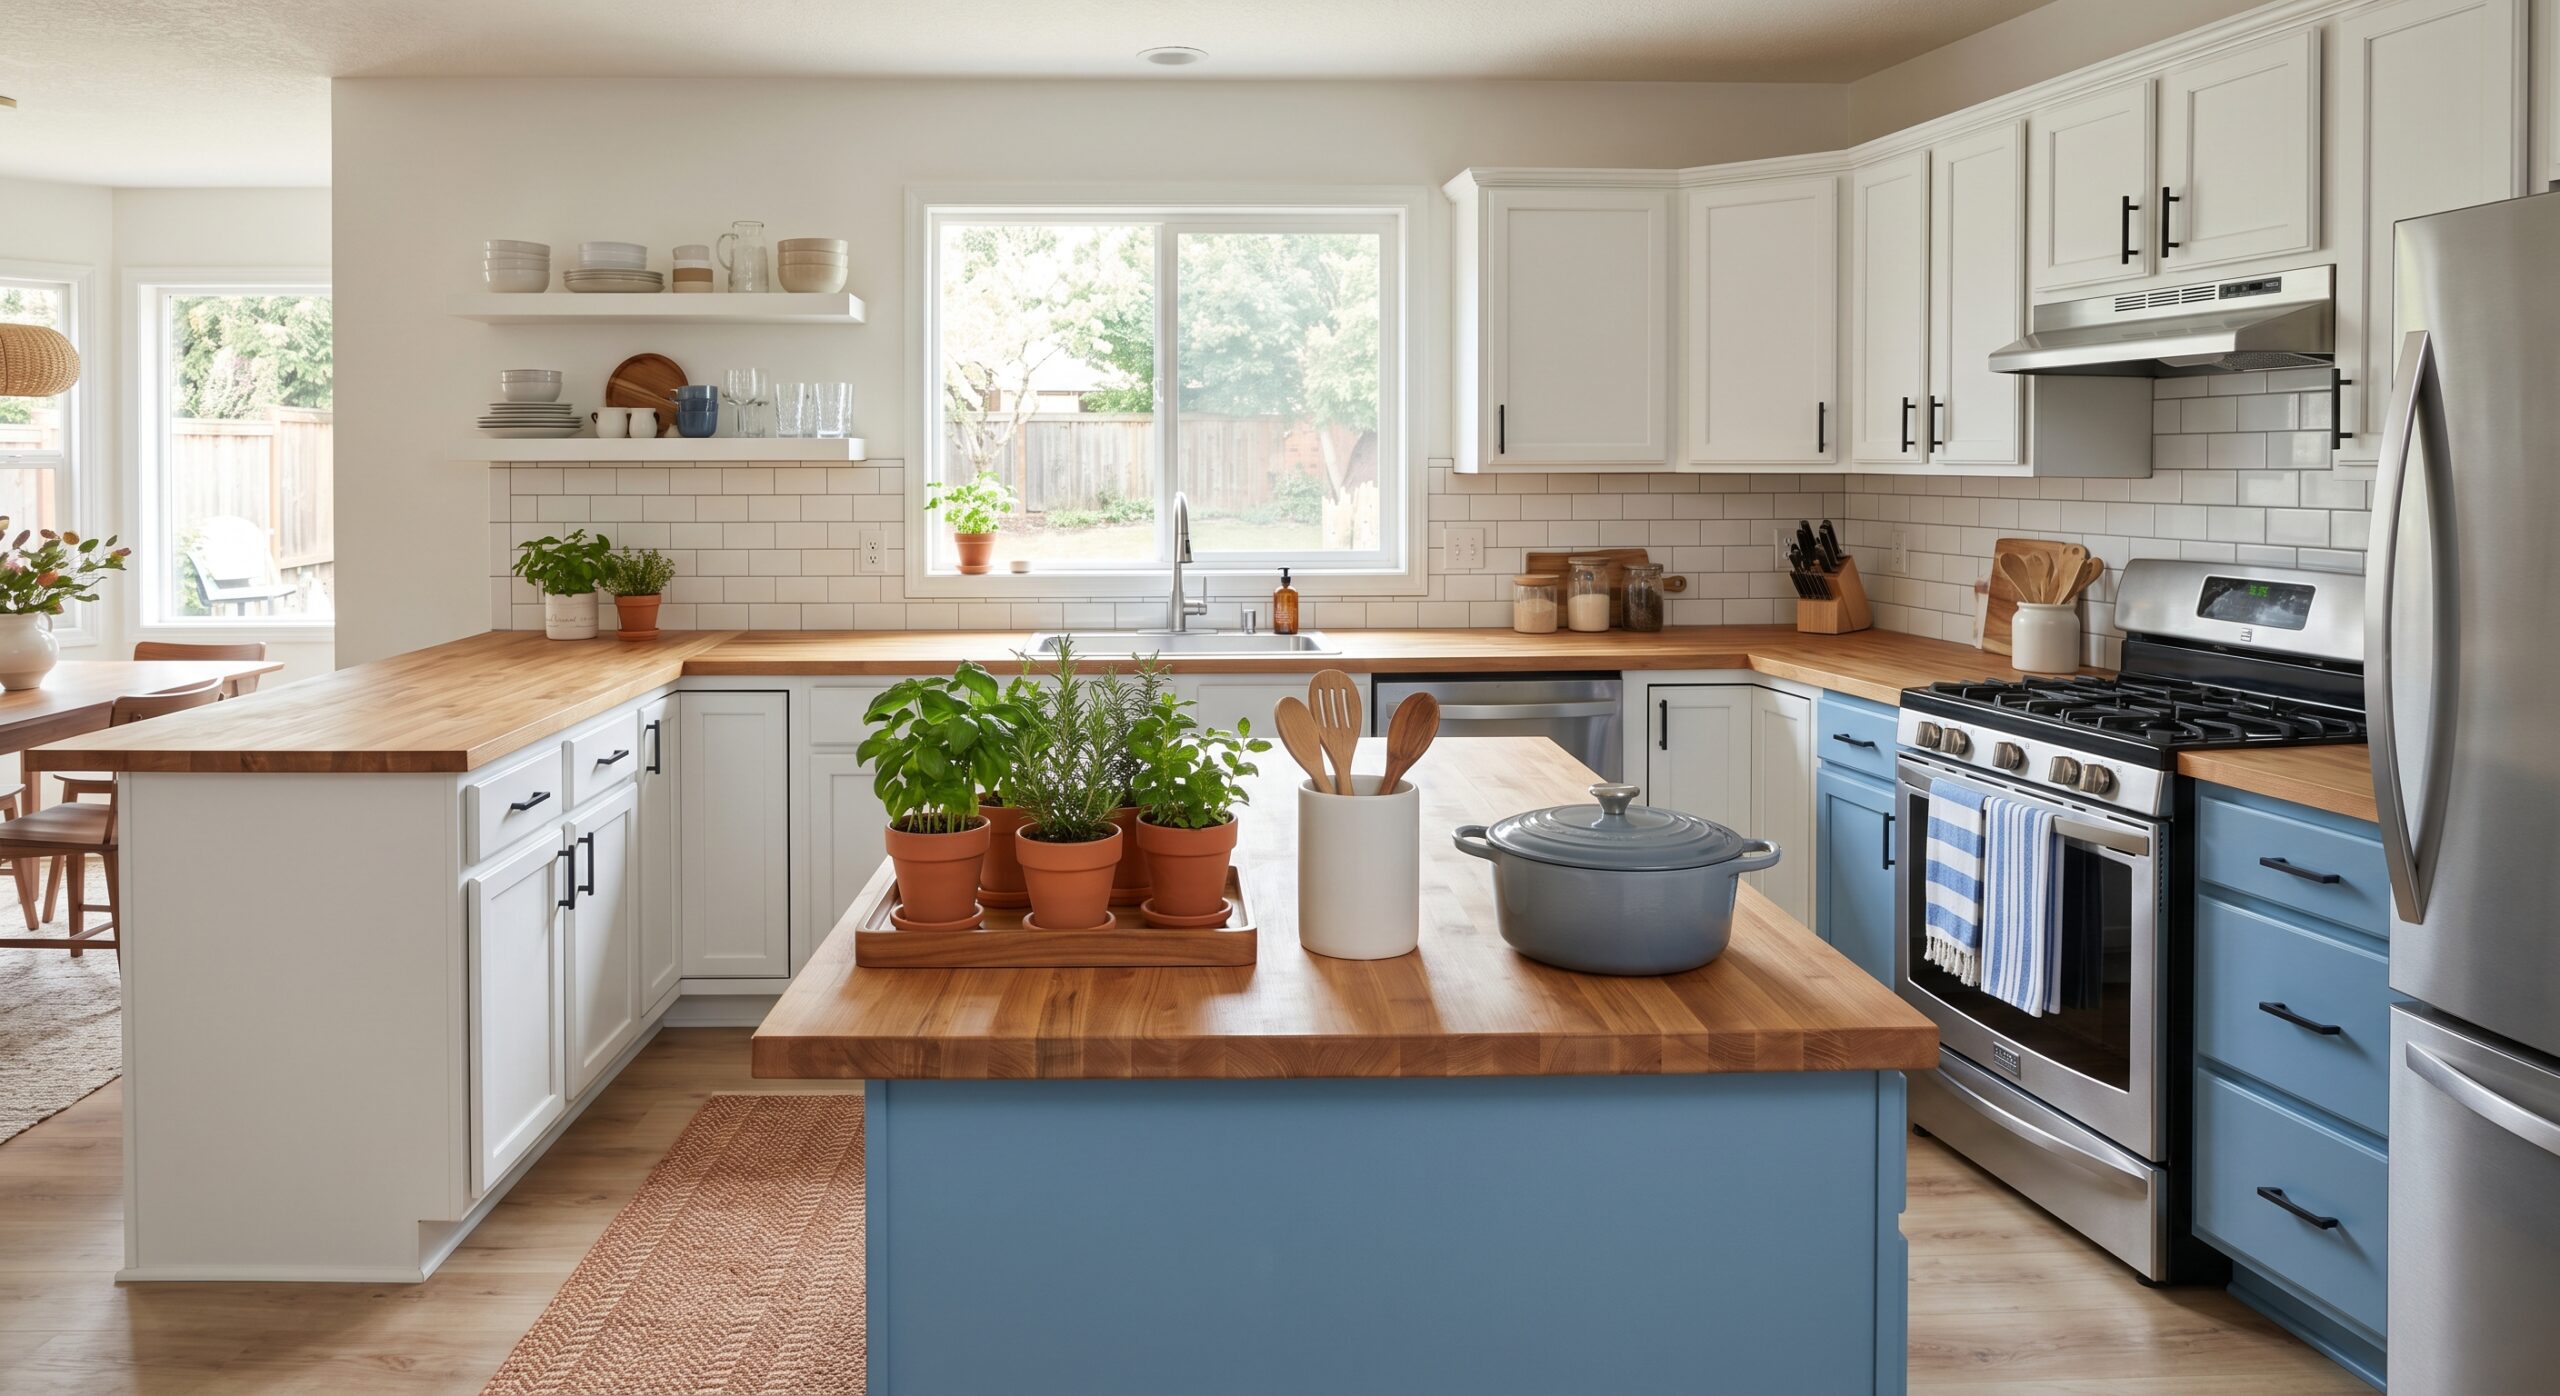
A budget kitchen makeover shows you can update your cooking space without spending thousands. With planning and good material choices, you can renew cabinets, countertops, backsplashes, lighting, and flooring for under $1,500 in a typical mid-sized kitchen. Focus on the projects that give the most visual change with the least work and cost. Whether your kitchen looks outdated from the 1990s or just needs care, these methods help you create a fresh space without a big expense.
Why a Budget Kitchen Makeover Makes Sense
A 2025 study by the National Association of Realtors found that minor kitchen updates can raise home value by 3–5% and make daily life more pleasant. A fresh coat of paint, new hardware, and better lighting can change the whole feel of the room without the cost of a full renovation. For renters or those preparing to sell, these changes make a space more welcoming and useful without permanent work.
Small kitchen updates also reduce daily stress by improving workflow and storage. Cluttered drawers, dim lighting, and outdated cabinets may seem like minor annoyances, but they add up to daily frustration. A budget kitchen makeover fixes these problems through better organization, improved lighting, and cleaner surfaces—all possible in a weekend or two.
What a Budget Kitchen Makeover Costs in 2026
Costs depend on kitchen size and material choices. Here’s a realistic breakdown for a 10×10-foot kitchen:
| Project | Low End | Mid Range | DIY Friendly? |
|---|---|---|---|
| Cabinet resurfacing or repainting | $100–$300 | $500–$1,200 | Yes |
| New cabinet hardware | $20–$50 | $100–$300 | |
| Countertop refresh (peel-and-stick, laminate, or butcher block) | $200–$500 | $800–$1,500 | Yes |
| Backsplash update (paint, peel-and-stick, or basic tile) | $50–$200 | $300–$800 | |
| Lighting upgrade (pendant, under-cabinet, or LED) | $50–$150 | $300–$800 | |
| Flooring refresh (vinyl plank or paint) | $150–$400 | $600–$1,200 | |
| Shelf inserts and organizers | $50–$150 | $200–$400 | |
| Total Estimated Cost | $620 | $2,800 |
These figures reflect 2026 material prices and don’t include labor if you hire someone. The low-end total assumes you already have basic tools and shop sales at big-box stores. The mid-range budget allows for better materials and professional help on one or two projects. Most homeowners finish a full makeover for under $1,500 by focusing on paint, hardware, and lighting.
Step 1: Plan Your Budget Kitchen Makeover
Before you start, decide what you want to improve and set a realistic budget. Ask: What bothers me most in my kitchen? Is it storage, lighting, cabinets, or layout? Fix the biggest problems first. If your cabinets are falling apart, painting may not be enough—consider replacing doors or drawers. If lighting is poor, swapping one fixture can brighten the whole room.
Measure your kitchen and sketch a simple floor plan. Note ceiling height, window and door locations, and existing outlets. This helps you choose lighting and furniture that fit well. Check your local building codes before changing electrical work—review electrical safety rules if you plan any wiring.
Create a project timeline. Weekend DIYers should group similar tasks—like painting cabinets on Saturday and installing hardware on Sunday—to avoid constant setup and cleanup. If you rent, focus on reversible changes such as removable backsplashes and freestanding storage to protect your deposit.
Tools You Need for a Budget Kitchen Makeover
You don’t need a full workshop to refresh your kitchen. Most budget projects need basic tools you may already own:
- Paintbrushes and rollers
- Screwdriver set
- Drill with screwdriver bits
- Painter’s tape and drop cloths
- Level and measuring tape
- Safety glasses and gloves
- Putty knife and sandpaper
For flooring or countertop projects, consider renting a jigsaw or tile cutter if you don’t have precision tools. Many hardware stores rent tools for under $20 a day.
Step 2: Revitalize Your Kitchen Cabinets Without Replacing Them
Cabinets make up about 40% of a kitchen’s visual weight. Replacing them can cost $3,000–$10,000, but painting or refacing costs under $500 in most cases. Start by removing all doors and drawers, labeling them for easy reinstallation. Clean surfaces well with a degreaser like TSP substitute to remove grease that prevents paint adhesion.
Sand lightly to create a smooth surface—120-grit sandpaper works. Wipe away dust with a damp cloth and apply a coat of primer like Kilz or Zinsser. For paint, choose a semi-gloss or satin finish in a light or neutral color to brighten the room. Benjamin Moore’s “Chantilly Lace” or Sherwin-Williams’ “Pure White” are popular choices. Allow paint to dry fully between coats—usually 4–6 hours.
If your cabinets are solid but the finish is peeling, consider refacing. This means replacing doors and drawer fronts while keeping the existing boxes. Companies like Home Depot and Cabinet Rescue sell refacing kits starting at $500, including new hardware and veneer panels. For a DIY approach, attach new wood or laminate panels to the cabinet frames and install fresh doors from IKEA or Home Depot.
To add personality without painting, replace old hardware with modern pulls and knobs. Brushed nickel, matte black, or brass finishes update cabinets quickly. A full set of 20 knobs and pulls costs under $50 at stores like Lowe’s or Amazon. Install them with a drill and level to keep them even.
Compare cabinet updates to other DIY projects—they rank among the best ways to boost home value on a budget.
Step 3: Refresh Your Countertops Without the High Cost
New countertops can cost $2,000–$5,000, but budget-friendly options give a similar look. Peel-and-stick countertops, like those from Countertop Epoxy or Rust-Oleum, cost $50–$200 and install in a weekend. These mimic granite or quartz and cut to size with a utility knife. They suit renters or those planning to sell.
For a more durable option, consider butcher block or laminate. Butcher block countertops from IKEA or Home Depot cost $100–$300 and install easily with construction adhesive and screws. Laminate sheets from Wilsonart or Formica run $50–$150 and can apply over existing countertops using contact cement. Sand lightly and clean the surface before application to ensure adhesion.
If your existing countertops are in good shape but look dated, a fresh coat of paint can help. Use a bonding primer like Gripper and a high-quality countertop paint such as Benjamin Moore’s “Epoxy Acrylic.” These paints resist heat, stains, and scratches better than regular wall paint. Allow 24 hours for full curing before using the counters.
DIY Countertop Upgrades That Look Custom
Add a backsplash extension to your countertop for a custom look. This means adding a 4-inch strip of tile or wood along the back edge. Use peel-and-stick tile for an easy update or paint a contrasting color for a bold statement. Another trick is to add a kitchen island on wheels—these cost $100–$300 and move as needed.
Step 4: Update Your Backsplash for a Big Change
A backsplash ties your kitchen together, and updating it can transform the whole space. Peel-and-stick tiles are the easiest option, costing $2–$10 per square foot and installing in under an hour. Brands like Smart Tiles and WallPops offer realistic patterns that mimic subway tile or marble. Clean the wall with rubbing alcohol before application to ensure the adhesive sticks.
For a more permanent solution, consider basic ceramic tile. A 3×6 subway tile kit from Home Depot costs $150–$300 and includes adhesive and grout. While tiling needs more skill, the results last for decades. Use a notched trowel to spread thinset evenly and wipe away excess grout with a damp sponge to avoid haze.
Paint is another budget-friendly backsplash option. Use a semi-gloss paint in a bold color or metallic finish for a modern look. Apply painter’s tape to protect edges, then roll or brush on two coats. Add a clear polyurethane topcoat to protect the paint from moisture and grease.
Backsplash Ideas That Cost Little
- Glass mosaic tiles from IKEA ($50–$150)
- Beadboard paneling painted white ($40–$80)
- Chalkboard paint for a functional, custom surface ($30–$60)
- Reclaimed wood planks stained or painted ($100–$250)
- Stainless steel sheet for an industrial look ($80–$200)
Step 5: Brighten Your Kitchen with Smart Lighting
Old lighting can make even a well-designed kitchen feel gloomy. Swapping one fixture or adding under-cabinet lighting brightens the space fast. Start by replacing burnt-out bulbs with LEDs—these use 75% less energy and last 25 times longer than incandescent bulbs. Choose warm white (2700K–3000K) for a cozy feel or cool white (4000K) for a modern look.
For a big impact, install a new ceiling fixture. A basic flush-mount LED fixture from Home Depot costs $50–$150 and installs in under an hour. If your kitchen has track lighting, swap the track for a single pendant or recessed cans. For a more dramatic update, add under-cabinet LED strips. These adhesive-backed strips cost $20–$50 and plug into an outlet or hardwire into the cabinet.
Natural light is free and brightens your kitchen. Clean windows well and consider removing heavy valances or blinds that block light. If privacy is an issue, install sheer curtains or frosted window film, which costs $10–$30 per window.
Lighting Projects That Make a Difference
- Add plug-in puck lights under upper cabinets ($30–$80)
- Install a dimmer switch to control brightness ($20–$50)
- Swap a basic flush-mount for a semi-flush fixture ($60–$200)
- Add battery-powered LED strip lights inside glass cabinets ($25–$60)
- Replace a fluorescent fixture with a modern LED panel ($80–$150)
Learn how to install a light switch safely if you’re comfortable with basic electrical work. Always turn off the power at the circuit breaker before starting any wiring project.
Step 6: Refresh Your Flooring Without Replacing It
New flooring can cost $1,500–$4,000, but budget options refresh your kitchen without a full replacement. Peel-and-stick vinyl plank flooring is the easiest DIY option, costing $1–$3 per square foot and installing in a weekend. Brands like TrafficMASTER and FloorPops offer realistic wood and tile looks that are waterproof and durable. Clean the subfloor well and use a leveling compound if needed for a smooth surface.
For a more permanent solution, consider painting your existing floors. Use an epoxy-based paint like Rust-Oleum’s Floor Coating, which resists stains, scratches, and moisture. Clean the floor with a degreaser, sand lightly, and apply a bonding primer before painting. Allow 72 hours for full curing before walking on the surface.
Another option is to lay peel-and-stick tile directly over existing vinyl or linoleum. These tiles cost $1–$3 per square foot and cut to fit around obstacles. For a rustic look, stencil a pattern onto your existing floors using porch and floor paint.
Flooring Upgrades That Look Expensive
- Stencil a checkerboard or geometric pattern ($50–$150)
- Add area rugs to define spaces and add warmth ($50–$200)
- Install cork flooring tiles ($100–$300)
- Use large-format vinyl planks to minimize seams ($200–$500)
- Paint a faux rug design for a custom look ($40–$100)
Step 7: Maximize Storage and Organization
A cluttered kitchen feels smaller and more stressful. Adding simple organizers can double your storage space without remodeling. Start by decluttering—donate or toss items you haven’t used in a year. Then, install shelf inserts or risers in cabinets to create extra storage for plates, bowls, or cans. These plastic or metal inserts cost $10–$30 each and install in minutes.
For upper cabinets, add a pull-down shelf or lazy Susan to make items easier to reach. These hardware kits cost $30–$80 and install with basic tools. In drawers, use dividers or organizers to separate utensils, cutlery, and small items. Magnetic strips mounted inside cabinet doors hold spice jars and small tools, freeing up drawer space.
Freestanding storage like a rolling island or baker’s rack adds counter space and storage without permanent changes. These units cost $100–$300 and move as needed. Add baskets or bins to corral loose items and keep the kitchen tidy.
Storage Hacks That Save Space and Money
- Hang a pegboard on an empty wall for pots, pans, and tools ($20–$50)
- Use over-the-door organizers for cleaning supplies or pantry items ($15–$30)
- Install a ceiling-mounted pot rack for hanging cookware ($40–$100)
- Add a spice rack inside a cabinet door ($10–$25)
- Use tension rods to create extra shelf space in cabinets ($5–$15)
Step 8: Add Finishing Touches That Make Your Kitchen Feel New
Small details turn a kitchen from “good enough” to “great.” Start by updating outlet and switch covers—these inexpensive plates (under $2 each) come in modern finishes like matte black or brushed gold. Next, replace an old faucet with a new one. A basic pull-down sprayer faucet from Moen or Delta costs $100–$200 and installs in under an hour with a basin wrench.
Add open shelving to display dishes, glassware, or cookbooks. Install floating shelves from Home Depot or IKEA ($20–$50 each) and style them with plants, books, or decorative items. If you lack counter space, consider a wall-mounted pot filler or soap dispenser to free up room.
Refresh your window treatments. Swap heavy curtains for sheer panels or Roman shades. These cost $20–$100 and install in minutes. Add a backsplash of framed art or a chalkboard for a personal touch. For renters, removable decals or peel-and-stick wallpaper add pattern without damaging walls.
Finishing Touches That Cost Under $20
- New cabinet knobs or pulls ($5–$20)
- Decorative switch plates ($2–$10)
- Faucet aerator for better water flow ($5–$15)
- Chalkboard paint for a message center ($10–$20)
- Battery-powered under-cabinet lights ($20–$40)
Budget Kitchen Makeover Mistakes to Avoid
Even the best plans can go wrong if you skip key steps. Avoid these common errors to keep your makeover on track and looking professional:
Skip the Prep Work
Painting cabinets without sanding or priming leads to peeling paint and uneven surfaces. Always clean, sand, and prime before painting. For peel-and-stick products, clean walls with rubbing alcohol to remove grease and dust. Skipping this step causes the adhesive to fail, leading to peeling tiles or countertops.
Ignore Lighting Needs
One overhead light isn’t enough for a usable kitchen. Layer lighting with task, ambient, and accent lights for balance. Without under-cabinet lighting, food prep becomes difficult. Without dimmers, the kitchen feels too harsh or too dim at different times.
Choose the Wrong Paint or Materials
Kitchen paint must handle heat, grease, and moisture. Use a semi-gloss or satin finish for cabinets and walls—these clean easily and resist stains. Avoid flat paint, which shows every fingerprint and can’t be wiped clean. For countertops, choose epoxy-based paint or laminate that’s heat-resistant and durable.
Overlook Electrical Safety
If you install new lighting or outlets, check local codes. Some areas require permits for electrical work. If unsure, hire an electrician for the day—it’s cheaper than a fire hazard. Never work on live wires, and always turn off power at the circuit breaker first.
For more on electrical safety, read our guide on when to call a pro.
Skimp on Measurements
A backsplash that’s too narrow or hardware that’s uneven throws off the whole kitchen. Measure twice, cut once. Use a level to keep shelves and fixtures straight. For peel-and-stick products, buy 10% extra to allow for mistakes and pattern matching.
Budget Kitchen Makeover Timeline for Weekend DIYers
With planning, you can finish a full kitchen makeover in two weekends. Here’s a realistic schedule:
| Weekend | Tasks | Time Required |
|---|---|---|
| Weekend 1 | Declutter and clean kitchen; remove cabinet doors and drawers; sand and prime cabinets; paint cabinet boxes | 8–10 hours |
| Paint cabinet doors and drawer fronts; let dry overnight; install new hardware | 4–6 hours | |
| Weekend 2 | Update backsplash (peel-and-stick or tile); refresh countertops (paint or laminate); install under-cabinet lighting | 6–8 hours |
| Add freestanding storage; install new lighting fixtures; add finishing touches | 4–6 hours |
This schedule assumes you work alone and group similar tasks. With help, you can finish in one weekend. For larger kitchens or complex projects, spread work over three weekends.
Real-Life Budget Kitchen Makeover Examples
Here’s how three homeowners transformed their kitchens for under $1,500:
Example 1: The $600 Transformation
Homeowner: Sarah, 35, rents a 1980s ranch in Ohio.
Projects:
- Painted cabinets white with semi-gloss paint ($150)
- Swapped hardware for brushed nickel pulls ($40)
- Added peel-and-stick subway tile backsplash ($120)
- Installed battery-powered LED strip lights under cabinets ($50)
- Decluttered and added freestanding storage ($100)
- Replaced faucet with pull-down sprayer ($80)
- Added open shelving with plants and dishes ($60)
Result: A bright, modern kitchen that feels new without permanent changes. Sarah used leftover paint and materials from her local Habitat for Humanity ReStore, cutting costs by 30%.
Example 2: The $1,200 Refresh
Homeowner: Mark, 42, owns a 1990s split-level in Texas.
Projects:
- Refaced cabinets with new doors and paint ($800)
- Installed butcher block countertops ($300)
- Added peel-and-stick vinyl plank flooring ($200)
- Upgraded lighting with new ceiling fixture and under-cabinet LEDs ($150)
- Added rolling island for extra storage ($100)
Result: Mark’s kitchen now feels like a 2020s home. He saved $2,000 by doing the work himself and shopping sales at Home Depot.
Example 3: The $300 Weekend Warrior
Homeowner: Lisa, 28, lives in a small apartment in New York City.
Projects:
- Painted upper cabinets and added open shelving ($100)
- Added peel-and-stick tile backsplash ($80)
- Swapped light fixtures and bulbs ($50)
- Decluttered and added magnetic knife strip ($20)
- Added decorative switch plates and outlet covers ($20)
- Used contact paper to refresh countertops ($30)
Result: Lisa’s kitchen feels brand new in a weekend. She used removable materials to avoid losing her security deposit.
Where to Find the Best Deals on Budget Kitchen Makeover Materials
Shopping smart keeps costs down. Here’s where to find good deals:
Big-Box Stores
Home Depot, Lowe’s, and Menards offer price matching, coupons, and seasonal sales. Check the “Oops Paint” section for discounted paint in many colors. Their in-house brands (like Behr or Glidden paint) are high-quality and affordable. Sign up for emails for 10–15% off coupons for your first purchase.
Habitat for Humanity ReStore
ReStores sell donated building materials, appliances, and fixtures at 50–90% off retail prices. You’ll find gently used cabinets, countertops, hardware, and lighting at bargain prices. Call ahead to check inventory, as selection varies by location. Many ReStores also sell discounted paint and tools.
Facebook Marketplace and Craigslist
Local buy/sell groups and Craigslist are goldmines for discounted kitchen materials. Look for listings like “kitchen cabinets for free” or “IKEA cabinets $50.” Always inspect items in person before buying. Negotiate prices—many sellers drop prices for a quick sale.
Tip: Search for “kitchen island” or “cabinet doors” to find parts that fit your space.
IKEA
IKEA sells affordable cabinets, hardware, and storage solutions for DIYers. Their SEKTION cabinets start at $60 per unit, and you can customize sizes and finishes. The METOD system works with many countertops and appliances. IKEA also sells peel-and-stick backsplash tiles and countertop materials at budget prices.
Online Retailers
Amazon, Wayfair, and Overstock offer discounts on peel-and-stick products, lighting, and hardware. Check reviews carefully to avoid low-quality materials. Look for Prime-eligible items to save on shipping. Home Depot and Lowe’s offer free in-store pickup on many online orders, saving shipping costs.
Discount Hardware Stores
Stores like Harbor Freight and Tractor Supply Co. sell tools and materials at low prices. While selection is limited, you’ll find basics like paintbrushes, sandpaper, and adhesives for a fraction of big-box prices. Always compare prices—some items are cheaper online.
How to Maintain Your Budget Kitchen Makeover
A fresh kitchen needs care to stay looking great. Follow these tips to keep your updates in good shape and avoid costly repairs:
Cleaning and Care
- Wipe cabinets and walls weekly with a damp microfiber cloth and mild soap to remove grease and dust.
- Clean countertops daily with a disinfectant wipe or spray—especially after raw meat or dairy.
- Avoid abrasive cleaners on painted surfaces, as they can dull the finish.
- For peel-and-stick backsplashes, avoid harsh chemicals and abrasives to prevent peeling.
- Sweep and mop floors weekly to prevent dirt buildup.
Preventing Wear and Tear
- Use cutting boards to protect countertops from scratches and heat.
- Place mats under appliances to prevent scratches on floors.
- Avoid hanging heavy pots or pans on cabinet doors to prevent sagging.
- Use furniture pads under freestanding storage to prevent scratches on floors.
- Check peel-and-stick products yearly for lifting edges and reapply adhesive as needed.
Updating Over Time
Budget materials like peel-and-stick tile may need refreshing every 3–5 years. Keep leftover materials in a cool, dry place for touch-ups. If your kitchen feels dated again, swap decor items like dish towels, rugs, or art to keep the space fresh without a full renovation.
Budget Kitchen Makeover vs. Full Renovation: Which Is Right for You?
Deciding between a budget makeover and a full renovation depends on your goals, budget, and timeline. Here’s a quick comparison:
| Factor | Budget Kitchen Makeover | Full Kitchen Renovation |
|---|---|---|
| Cost | $500–$3,000 | $15,000–$50,000+ |
| Time | 1–2 weekends | 6–12 weeks |
| Disruption | Minimal (can live in space) | High (may need to move out) |
| Permits | Usually not required | Often required for plumbing, electrical, or structural changes |
| Permanence | Reversible (great for renters) | Permanent (adds value for homeowners) |
| Return on Investment | 3–7% increase in home value | 70–80% ROI if completed under $30,000 |
Choose a budget kitchen makeover if you’re on a tight budget, need quick updates, or rent your home. Opt for a full renovation if you plan to stay long-term, need to fix structural issues, or want to change the layout. Most homeowners find a mix works best—like a budget makeover now and a full renovation in 5–10 years.
FAQs About Budget Kitchen Makeovers
Can I really update my kitchen for under $500?
Yes. Many homeowners finish a full makeover for under $500 by focusing on paint, hardware, and lighting. Start with fresh paint on cabinets and walls, swap hardware, and add peel-and-stick backsplash and lighting. Decluttering and freestanding storage stretch your budget further.
What’s the easiest project to start with?
The easiest project is usually swapping cabinet hardware. It takes under an hour, costs under $50, and makes an immediate impact. Painting cabinets is next easiest, as it needs basic tools and can finish in a weekend.
Do I need to remove cabinets to paint them?
No. You can paint cabinets in place by removing doors and drawers, sanding lightly, and applying primer and paint. Use painter’s tape to protect walls and countertops. For a pro finish, remove hardware and label each door/drawer for easy reinstallation.
How long does a budget kitchen makeover last?
A well-done budget kitchen makeover can last 5–10 years, depending on materials. Painted cabinets and walls usually last 5–7 years before needing a refresh. Peel-and-stick products may need replacing every 3–5 years. Regular care extends the life of your updates.
Can I do a budget kitchen makeover in a rental?
Yes. Focus on reversible changes like peel-and-stick backsplashes, freestanding storage, and removable decor. Avoid painting walls or installing permanent fixtures. Use contact paper to refresh countertops and backsplashes, and choose battery-powered lighting to avoid electrical changes.
What’s the best color for kitchen cabinets on a budget?
White is the most popular choice because it brightens the space and matches any decor. Soft grays, blues, and greens also work. Avoid dark colors, as they can make small kitchens feel cramped. Use semi-gloss or satin finishes for durability and easy cleaning.
How do I choose the right peel-and-stick products?
Pick products with strong adhesive and realistic patterns. Brands like Smart Tiles, WallPops, and FloorPops are popular for durability and design. Always clean the surface well before application and use a level for straight install. Test a small area first to ensure the adhesive sticks.
Can I install a new light fixture myself?
If you’re comfortable with basic electrical work, installing a new light fixture is a manageable DIY project. Turn off power at the circuit breaker, remove the old fixture, and connect the wires to the new one. Use a voltage tester to confirm wires aren’t live. If unsure, hire an electrician for the day—it’s cheaper than a mistake.
What’s the best way to declutter my kitchen before a makeover?
Empty all cabinets and drawers. Sort items into four piles: keep, donate, toss, and relocate. Discard broken or expired items, donate duplicates or unused appliances, and move items that belong elsewhere. Wipe empty shelves and consider adding organizers to maximize space.
How do I add storage without remodeling?
Freestanding storage like a rolling island, baker’s rack, or shelving unit adds space without permanent changes. Add shelf inserts, risers, or dividers to existing cabinets to double storage. Use over-the-door organizers, pegboards, and magnetic strips to corral loose items. Keep counters tidy with baskets and bins.
Your Budget Kitchen Makeover Starts Now
A budget kitchen makeover isn’t just about saving money—it’s about making your space work for you. Whether you rent and prepare to move or own and want to refresh without a full renovation, these methods show that small changes make a big difference. Start with a plan, focus on high-impact projects, and shop smart to stretch your budget.
Remember, the goal isn’t perfection—it’s creating a kitchen that feels functional, inviting, and uniquely yours. With a little creativity and effort, you can transform your cooking space into a room you’re proud to show off. So grab your paintbrush, measure your cabinets, and get ready to love your kitchen again.
For more ideas, see our guide to budget-friendly home improvements or check out the highest-return DIY projects to compare your kitchen updates.
Key Points
- A budget kitchen makeover can refresh your space for under $1,500 with planning and smart material choices.
- Focus on high-impact projects like painting cabinets, updating hardware, and adding lighting.
- Peel-and-stick products, paint, and freestanding storage are affordable alternatives to costly renovations.
- Shop smart at ReStores, Facebook Marketplace, big-box stores, and IKEA to find discounted materials.
- Maintain your updates with regular care to keep your kitchen looking fresh for years.
Leave a Reply