Category: Home Repairs

  • Essential DIY Home Repair Tips for Budget-Conscious Homeowners

    Essential DIY Home Repair Tips for Budget-Conscious Homeowners

    Fixing a leaky faucet, patching a hole in the wall, or unclogging a drain doesn’t require expensive tools or professional help. Most homeowners can handle small repairs themselves with basic tools and save hundreds on service calls. Whether you’re dealing with plumbing, electrical, or structural issues, these DIY home repair tips will help you maintain your home without spending much.

    At a Glance

    Key Facts:

    • Cost Savings: DIY repairs can save homeowners an average of $200–$500 per year on service calls, according to the U.S. Department of Energy.
    • Accessibility: Most basic repairs require only common household tools and materials costing under $50.
    • Skill Building: Completing small fixes builds confidence for larger projects.
    • Safety First: Always turn off power or water before starting repairs.

    This guide covers cheap home fixes for common issues—from squeaky floors to running toilets—and explains when it’s worth calling a pro.


    Why DIY Home Repair Saves Money and Builds Skills

    In 2025, the average cost of a professional home repair call reached $150–$300 just for the service fee, according to Angie’s List. Many of these issues—like a dripping faucet or a loose cabinet hinge—require only a screwdriver and a few minutes. Learning basic home repair skills lets homeowners:

    • Cut ongoing costs: Fixing a running toilet can save up to $200 annually in water waste.
    • Increase home value: Well-maintained homes hold their value better. A 2024 National Association of Home Builders report found that homes with updated plumbing and electrical systems sold 7% faster than those needing repairs.
    • Gain independence: No need to wait days for an appointment or pay for unnecessary parts.

    For example, replacing a showerhead costs less than $25 and takes 10 minutes, but a plumber could charge $100 for the same job. These affordable home maintenance tasks add up to significant savings over time.

    Start with small, low-risk projects like patching drywall or tightening loose hinges. Each completed repair builds your confidence for bigger challenges like light switch replacements or toilet repairs.


    Essential Tools for DIY Home Repairs

    You don’t need a garage full of tools to fix most household issues. A well-organized essential tool kit can handle 80% of basic repairs. Here’s what every budget-conscious homeowner should own:

    Tool Purpose Cost (USD)
    Adjustable wrench (8–10 inch) Tightening nuts and bolts on pipes, faucets, and fixtures $10–$20
    Phillips and flathead screwdrivers Assembling furniture, tightening cabinet hinges, removing outlet covers $5–$15
    Putty knife (2–3 inch) Patching drywall holes, scraping paint or caulk $5–$10
    Cordless drill/driver Drilling pilot holes, driving screws into wood and drywall $50–$100
    Tape measure (25 feet) Measuring spaces for shelves, blinds, or furniture placement $10–$20
    Utility knife Cutting drywall, trimming carpet, opening packages $5–$12
    Needle-nose pliers Tightening small nuts, bending wire, retrieving items from drains $8–$15
    Caulk and sealants (silicone and latex) Sealing gaps around windows, sinks, and baseboards $8–$25

    For under $150, you can assemble a functional foundation for DIY repairs. Skip specialty tools like pipe wrenches or oscillating saws until you tackle specific projects. As your skills grow, you can expand your kit with a curated list of must-haves.


    What You Can Skip: Overrated Tools for DIYers

    Some tools marketed to DIYers are rarely used by homeowners. Avoid spending money on:

    • Automatic caulk guns: A simple manual caulk gun works for most household repairs.
    • Expensive multitools: Unless you’re cutting metal pipes regularly, a basic hacksaw or reciprocating saw suffices.
    • Specialty wrenches: A single adjustable wrench covers 90% of nut and bolt tasks.
    • Laser levels: A $20 bubble level is accurate enough for most vertical and horizontal alignments.

    Focus your budget on versatility, not gimmicks. A well-chosen toolkit outperforms a cluttered collection of rarely used gadgets.


    Quick Fixes for Common Household Problems

    These cheap home fixes tackle the most frequent annoyances homeowners face. Each solution costs under $25 and takes less than 30 minutes.


    1. Fixing a Leaky Faucet (Plumbing)

    According to the U.S. Environmental Protection Agency, a leaky faucet dripping at one drop per second wastes more than 3,000 gallons of water annually. Fixing it is straightforward:

    Materials Needed:

    • Replacement washer or cartridge (specific to faucet model)
    • Adjustable wrench
    • Flathead screwdriver
    • Teflon tape (optional, to prevent future leaks)

    Steps:

    1. Turn off the water supply: Locate the valves under the sink and turn clockwise to shut off water flow.
    2. Disassemble the faucet: Remove the handle with a screwdriver, then unscrew the packing nut with an adjustable wrench.
    3. Replace the washer or cartridge: Take the old part to a hardware store to match the replacement. Install the new washer or cartridge, ensuring it sits flush.
    4. Reassemble and test: Turn the water back on and check for leaks. Use Teflon tape on threads to prevent future seepage.

    If the faucet still leaks, the issue might be a corroded valve seat, which requires a $5 seat wrench or a call to a plumber. But in most cases, a $3 washer resolves the problem permanently.


    2. Unclogging a Drain (Plumbing)

    A clogged sink or shower drain costs $120–$250 to have professionally cleared. Save that money with a plunger or a drain snake:

    Method 1: Plunger

    • Fill the sink or tub with enough water to cover the plunger’s rubber cup.
    • Place the plunger over the drain and pump vigorously 10–15 times.
    • Remove the plunger and run hot water to flush the clog away.

    Method 2: Drain Snake (Auger)

    A 25-foot drain snake costs $20 and handles hair clogs in showers better than a plunger. Insert the snake into the drain and crank the handle to break up or retrieve the obstruction.

    Prevention tip: Use a drain strainer to catch hair and debris. Pour a cup of baking soda followed by vinegar monthly to break down buildup.


    3. Patching a Hole in Drywall (Interior Walls)

    A 1-inch hole in drywall can be fixed with a $5 patch kit and 15 minutes. For larger holes (up to 6 inches), you’ll need a scrap piece of drywall, joint compound, and a putty knife.

    Steps for Small Holes:

    1. Clean the area: Remove loose debris and sand the edges smooth.
    2. Apply spackle or joint compound: Fill the hole with spackle using a putty knife. Let it dry completely (usually 1–2 hours).
    3. Sand lightly: Smooth the patch with 120-grit sandpaper.
    4. Prime and paint: Match the paint color to your wall and touch up.

    For large holes, cut a square around the damaged area, insert a drywall patch, secure it with drywall tape, and cover with joint compound. Sand and paint once dry.

    Pro tip: Keep a small can of leftover paint from your last room project. Most hardware stores can match paint colors from a sample.


    4. Tightening Loose Cabinet Hinges (Furniture)

    Squeaky or sagging cabinet doors are an easy fix with a screwdriver. Loose hinges cause doors to misalign or scrape against the frame.

    Steps:

    1. Remove the hinge screws: Use a screwdriver to unscrew the loose hinge from the cabinet frame.
    2. Fill stripped holes (if needed): If screws won’t tighten, insert toothpicks coated in wood glue into the hole, then reinsert the screw.
    3. Realign the door: Adjust the hinge screws to center the door properly.
    4. Tighten all screws: Ensure no screws are left loose.

    This budget-friendly fix costs nothing and restores smooth cabinet operation in minutes.


    5. Replacing a Toilet Flapper (Bathroom)

    A worn-out flapper causes a toilet to run continuously, wasting up to 200 gallons of water per day. Replacing it costs $5 and takes 10 minutes.

    Steps:

    1. Turn off the water supply: Locate the valve behind the toilet and shut it off.
    2. Flush the toilet: Empty the tank completely.
    3. Remove the old flapper: Unhook the flapper from the flush valve and lift it off the overflow tube.
    4. Install the new flapper: Attach the new flapper to the flush valve and overflow tube. Ensure the chain has ½ inch of slack.
    5. Test the flush: Turn the water back on and check for leaks or running.

    If the toilet still runs, the flush valve might be corroded and need replacement, which costs $15–$25.


    Electrical Repairs You Can Do Safely

    Electrical work requires caution, but many basic tasks—like replacing a light switch or outlet cover—are within reach for beginners. Always follow these safety protocols:

    • Turn off the power: Use the circuit breaker or fuse box to shut off electricity to the area you’re working on.
    • Test before touching: Use a non-contact voltage tester to confirm wires are dead.
    • Use insulated tools: Avoid metal tools that can conduct electricity.
    • Call a pro for complex tasks: Wiring a new circuit or installing a ceiling fan should be left to licensed electricians.

    6. Replacing a Light Switch

    A faulty light switch flickers or fails to turn lights on or off. Replacing it costs under $10 and takes 15 minutes. For a step-by-step guide, visit How to Install a Light Switch: A Complete Beginner’s Guide.

    Key steps include:

    1. Turn off power at the circuit breaker.
    2. Remove the switch plate and unscrew the switch from the electrical box.
    3. Disconnect the wires and connect them to the new switch (match the colors: black to black, green to ground).
    4. Secure the switch in the box and reinstall the plate.

    If you’re unsure about wiring, consult a beginner’s guide like Electrical Basics for Beginners before starting.


    7. Fixing a Loose Outlet

    An outlet that wiggles or doesn’t hold plugs securely may have loose screws in the electrical box. Tightening them can restore function:

    Steps:

    1. Turn off the power: Use the circuit breaker to cut electricity to the outlet.
    2. Remove the outlet cover: Unscrew the cover plate and outlet screws.
    3. Tighten the outlet screws: The outlet should be snug against the electrical box. If not, tighten the screws holding it in place.
    4. Check for damage: If the outlet is cracked or scorched, replace it with a new $5 outlet.
    5. Test the outlet: Use a voltage tester to ensure it’s working before restoring power.

    Safety note: If wires are frayed or the box feels hot, call an electrician immediately.


    When to Call a Professional

    While many DIY repair tasks save money, some repairs require professional expertise. Know your limits to avoid costly mistakes or safety hazards:

    Issue DIY Risk Professional Solution Estimated Cost
    Gas line leaks Explosion or carbon monoxide poisoning Call your gas company immediately Free (emergency service)
    Major electrical wiring (new circuits, panels) Electrocution or fire hazard Licensed electrician $400–$1,200
    Structural cracks wider than ¼ inch Compromised foundation Structural engineer or contractor $300–$1,000+
    Water heater installation Gas or water leaks Plumber $800–$2,000
    Mold remediation (larger than 10 sq ft) Health risks and spread of spores Certified mold remediation specialist $500–$6,000

    If a repair involves permits, specialized tools, or potential hazards, hiring a pro is the smarter choice. For example, installing a new toilet is DIY-friendly, but rerouting plumbing for a bathroom remodel often requires a plumber.

    Use this rule of thumb: If the repair could cause water damage, fire, or structural compromise, call a professional. Otherwise, embrace the challenge with your affordable home maintenance toolkit.


    DIY Repairs That Add Long-Term Value

    Not all budget-friendly fixes are reactive. Some proactive repairs improve your home’s efficiency and resale value:

    Project Cost (DIY) ROI (Resale Value Increase) Time Required
    Sealing air leaks around windows and doors $10–$50 3–10% (energy savings) 2 hours
    Adding weatherstripping to exterior doors $15–$40 2–7% (reduced heating/cooling costs) 30 minutes
    Repairing or replacing damaged roof shingles $30–$150 5–15% (prevents water damage) 2–4 hours
    Painting exterior trim or siding $50–$200 3–8% (curb appeal) Weekend project

    These projects fall into the basic home repair skills category and can be completed in a weekend. For more inspiration, explore 15 Weekend DIY Projects That Add Value to Your Home for Under $100.


    Safety Guidelines for DIY Home Repairs

    Even small projects can pose risks. Follow these electrical safety guidelines to stay safe:

    • Avoid working on wet surfaces: Water and electricity are a dangerous combination. Dry surfaces thoroughly before electrical repairs.
    • Wear gloves and safety glasses: Protect your hands from sharp edges and debris.
    • Use ladders properly: Place the ladder on a flat, stable surface and maintain three points of contact (two hands and one foot, or two feet and one hand).
    • Inspect tools before use: Check for damaged cords, frayed wires, or cracked handles.
    • Work with a partner: Especially for heavy lifting or ladder tasks.

    For more safety tips, refer to OSHA’s guidelines for home improvement.


    Common Mistakes to Avoid

    Even the best DIY home repair tips can go wrong without proper planning. Steer clear of these pitfalls:

    • Skipping the permit: Some repairs, like electrical work or structural changes, require permits. Check local building codes to avoid fines.
    • Over-tightening screws: This can strip holes in wood or crack drywall. Tighten until snug, then stop.
    • Ignoring the root cause: Patching a hole in drywall without fixing the leak behind it leads to recurring damage.
    • Using the wrong materials: Cheap caulk or paint won’t last. Invest in quality products for long-term fixes.
    • Rushing the job: Take your time measuring, cutting, and assembling. Precision saves rework.

    For example, if you patch a wall without addressing a plumbing leak, mold will return in weeks. Always diagnose the problem before applying a cheap home fix.


    How to Know When a Repair Is Beyond DIY

    If you encounter any of the following during a repair, stop and call a professional:

    • Gas smells or hissing sounds near pipes.
    • Electrical sparks or buzzing sounds from outlets.
    • Water pooling where it shouldn’t (under sinks, around toilets).
    • Structural beams or joists showing significant sagging or cracks.
    • Any situation where you feel unsafe or unsure of the next step.

    Bottom line: Your safety and your home’s integrity come first. There’s no shame in knowing when to hire a pro.


    Building a Routine of Affordable Home Maintenance

    Preventative maintenance is the best way to avoid costly repairs. These budget-friendly fixes take less than an hour and prevent bigger headaches:

    • Monthly:
      • Check faucets and toilets for leaks.
      • Test smoke detectors and replace batteries.
      • Clean gutters and downspouts.
    • Quarterly:
      • Inspect caulking around sinks, tubs, and windows.
      • Tighten loose cabinet hinges and doorknobs.
      • Test GFCI outlets (use the “test” button).
    • Annually:
      • Clean refrigerator coils to improve efficiency.
      • Inspect roof shingles for damage after winter.
      • Drain and flush the water heater to remove sediment.

    By incorporating these tasks into your routine, you’ll catch small issues before they become expensive problems. For example, cleaning gutters prevents water damage to your foundation, which costs an average of $4,500 to repair, according to HUD.


    Resources to Expand Your DIY Skills

    Mastering basic home repair skills is a journey. Use these resources to build your expertise:

    For more targeted guidance, explore Budget Builds Daily’s DIY Home Repairs section, where we break down projects from start to finish.


    Final Thoughts: Confidence Comes with Practice

    Every expert was once a beginner. Start with simple DIY home repair tips like unclogging a drain or tightening a loose hinge. As your skills grow, tackle more complex projects like replacing a toilet or patching drywall. The key to saving money and maintaining your home is consistency.

    Remember:

    • Invest in a few essential tools and expand as you go.
    • Always prioritize safety—turn off power, water, and gas before starting repairs.
    • Know when to call a professional to avoid costly mistakes.
    • Celebrate small victories. Each repair completed is a step toward self-sufficiency.

    With the right approach, affordable home maintenance becomes second nature. Your home will thank you with fewer emergencies and a higher resale value.
  • The Essential Tool Kit for Home Repairs: What You Actually Need (And What to Skip)

    The Essential Tool Kit for Home Repairs: What You Actually Need (And What to Skip)

    Walking into a hardware store can feel overwhelming. Shelves overflow with gadgets and gear promising to solve every household problem. But do you really need all that equipment?

    This comprehensive buyer’s guide cuts through the noise. We help you identify which implements are genuinely necessary for common fixes around your house. You’ll learn what to prioritize and what to skip entirely.

    Understanding the difference between must-have items and optional extras saves you significant money. It also conserves precious storage space in your garage or closet. You’ll be prepared for the most frequent maintenance tasks without clutter.

    We examine both starter sets and individual purchases. Our recommendations come from extensive research and real-world testing. You’ll get specific product suggestions with brand names and price points.

    This resource addresses common situations people face. These include hanging artwork, putting furniture together, minor plumbing adjustments, and fixing walls. By the end, you’ll have a clear roadmap for building a functional set that matches your actual needs.

    Key Takeaways

    • Identify the core implements required for most common household fixes
    • Learn which items provide the best value versus those that add unnecessary bulk
    • Save money by focusing on versatile, multi-purpose equipment
    • Get specific brand and product recommendations based on real testing
    • Understand how to build your collection gradually as your skills grow
    • Prepare for typical scenarios like furniture assembly and basic plumbing
    • Create an organized storage system that keeps everything accessible

    Introduction to Home Repair Toolkits

    From tightening a loose screw to hanging artwork, everyday situations call for basic equipment that’s readily available. You don’t need to own a property to benefit from having fundamental tools within reach for minor adjustments around your living space.

    Every household requires a basic collection of implements. This includes renters in apartments and students in dorm rooms. A starter kit provides independence for anyone, not just the homeowner.

    Many people delay assembling their equipment until facing an urgent situation. This often leads to rushed purchases of inadequate or overpriced items. Having the right tools saves money by eliminating professional service calls for simple tasks.

    A well-chosen kit prevents both under-preparation and wasteful over-preparation. Your toolbox should match your living situation and skill level. It should reflect the types of projects you’ll most likely encounter.

    This foundation helps you make smart, cost-effective decisions about which implements deserve space in your collection. You’ll be prepared for common maintenance needs without unnecessary clutter.

    What to Expect from a Buyer’s Guide

    This resource takes a different approach from typical product comparisons you’ll find online. Rather than focusing on popularity or price alone, we emphasize practical utility for everyday situations.

    You’ll get honest assessments about quality across different price points. We discuss when budget-friendly options serve you well and when investing in premium equipment makes financial sense.

    Our recommendations include specific brands, model numbers, and approximate prices. This eliminates guesswork and helps you find exactly what you need for your projects.

    This guide prioritizes the core implements that handle most common tasks. We help you avoid collections padded with filler items that inflate tools counts but add little value.

    The advice balances immediate affordability with long-term value. Your starter kit may begin with entry-level options and evolve as your skills grow.

    You’ll learn to distinguish marketing claims from actual performance. This foundation supports smart purchasing decisions that work for your specific needs.

    Consider this a practical reference that grows with you. Return to it as your maintenance requirements change and your confidence with tools increases.

    Key Components of a Home Repair Toolkit

    The foundation of any well-stocked toolbox consists of several key components that serve multiple purposes. These fundamental pieces handle the majority of common maintenance situations you’ll encounter.

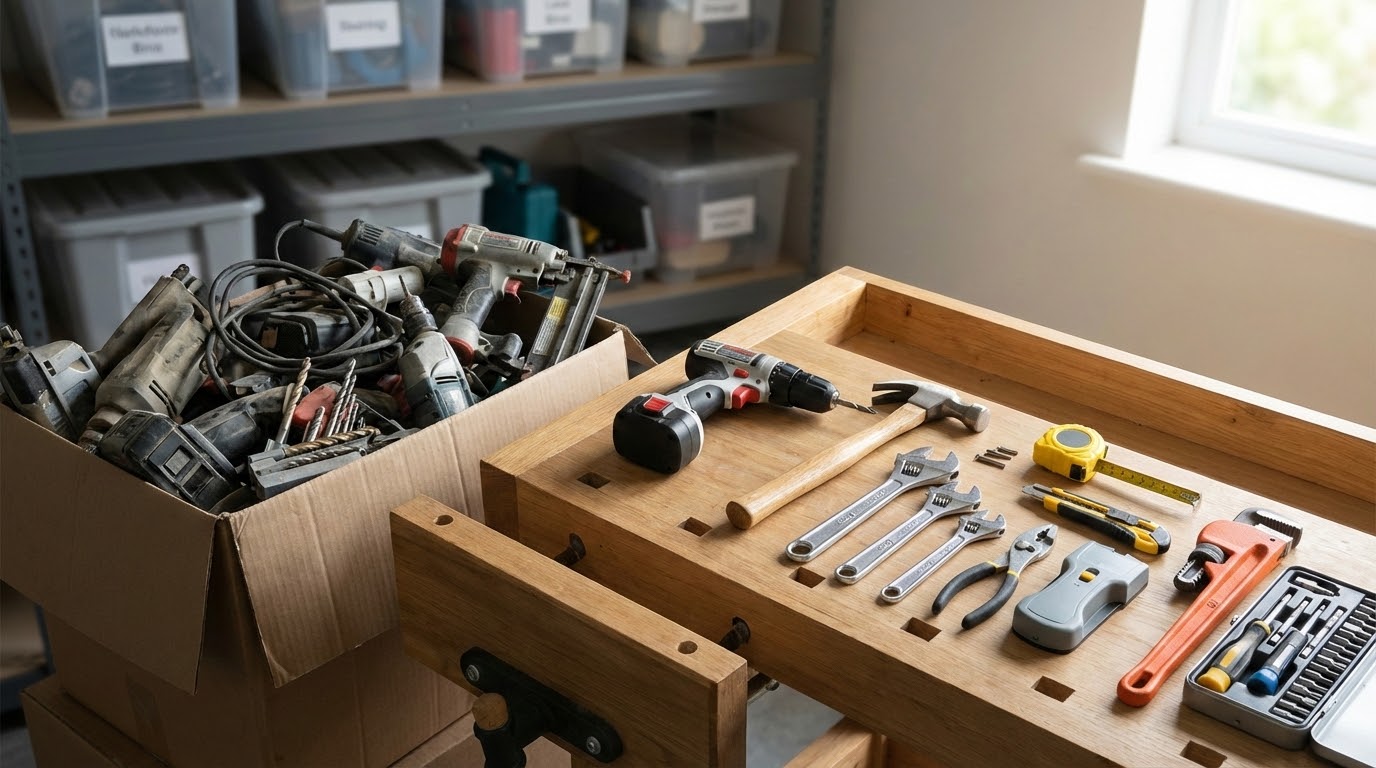
    A reliable hammer drives nails and performs light demolition work. A quality tape measure ensures accurate measurements for every project. A versatile screwdriver set handles various fastener types and sizes.

    The utility knife proves incredibly versatile. It opens packages, cuts drywall, and trims materials with precision. This hand tool offers safety and control for detailed cutting tasks.

    Pliers provide crucial gripping power. They twist wires, hold small fasteners, and grasp objects that slip from fingers. An adjustable wrench accommodates different nut and bolt sizes, eliminating the need for multiple fixed wrenches.

    A level prevents crooked installations. It ensures pictures, shelves, and mounted items hang straight from the start. This saves time and frustration by avoiding adjustments.

    These core components form the backbone of any functional kit. Each tool serves multiple functions across different projects. This versatility maximizes your initial investment value.

    Understanding why these items qualify as foundational helps you evaluate pre-packaged sets. You can identify which collections include genuine necessities versus unnecessary filler pieces.

    Essential Home Repair Tools

    Our comprehensive testing reveals the fundamental implements every household needs. After spending 80 hours researching nearly 85 different kits and testing 11 options, certain items consistently proved necessary for common situations.

    The hammer remains indispensable for driving nails and light demolition work. It also helps make adjustments to stuck items around your living space.

    A quality tape measure provides accurate dimensions for furniture placement and project planning. Having both imperial and metric markings offers valuable versatility for various tasks.

    The utility knife handles countless cutting needs safely. Replaceable blades maintain sharp performance without buying new tools.

    Screwdrivers address most fastener types found in household items. Both flathead and Phillips head varieties cover the majority of situations you’ll encounter.

    An adjustable wrench adapts to multiple nut and bolt sizes. This eliminates needing a complete wrench set for plumbing or furniture projects.

    Pliers deliver crucial gripping strength for stubborn fasteners. They hold small objects securely and bend wire with precision control.

    These core items form a collection that handles approximately 80-90% of common maintenance scenarios. They represent the highest-priority purchases for any new kit.

    Anatomy of a Basic Hand Tool Set

    Understanding what makes a basic hand tool set functional helps you avoid buying unnecessary items. These collections contain carefully selected components that work together for common household tasks.

    A quality set typically includes multiple screwdrivers in various sizes. You’ll find both Phillips and flathead types to match different fastener designs. This variety ensures you have the right tool for each screw you encounter.

    The screwdrivers in a good collection feature comfortable, non-slip handle designs. These grips reduce hand fatigue during extended use. They also provide better torque transfer when dealing with stubborn fasteners.

    Most basic hand tools sets include both standard and metric hex wrenches. These L-shaped wrench types are essential for furniture assembly and appliance maintenance. Having both measurement systems prepares you for various projects.

    Organization significantly impacts the usability of your tools. Well-designed cases keep items accessible and protected. Poor storage solutions lead to frustration when you can’t find what you need.

    • Logical compartmentalization – Each tool has a designated spot
    • Clear labeling – Quick identification of screwdriver sizes and types
    • Durable materials – Cases that withstand regular use and transport

    Evaluating a set‘s anatomy helps you distinguish genuine variety from padded counts. Look for meaningful size ranges rather than redundant pieces. A balanced collection handles common tasks without becoming overly bulky.

    The best screwdrivers and wrenches work together as a system. They cover the most frequent needs while maintaining compact storage. This approach maximizes utility while minimizing clutter.

    Evaluating Tool Quality and Performance

    The quality of your equipment directly impacts how efficiently you complete projects around your living space. Better tools make work smoother and deliver more professional results over time.

    Entry-level kits serve beginners well for occasional tasks. However, they lack the durability for frequent use. Understanding this distinction prevents frustration when budget equipment underperforms.

    Tool quality shows in several ways. Superior materials resist wear and breakage. Better designs improve comfort and functionality. Quality manufacturing ensures consistent performance.

    The performance gap becomes obvious during challenging tasks. Premium equipment grips better and applies force more effectively. They maintain accuracy and make projects more enjoyable.

    When building a permanent collection, start with key upgrades:

    • A reliable hammer with solid construction
    • A screwdriver set with comfortable grips
    • An accurate tape measure with clear markings

    Recognizing the variety of quality levels helps you make smart choices. You might begin with a basic kit but upgrade frequently used items first.

    Evaluate potential purchases by examining:

    • Material strength and durability
    • Construction methods and moving parts
    • Brand reputation based on user reviews

    This approach helps you build a capable collection that grows with your skills. You’ll avoid repeatedly replacing failed budget tools.

    Smart Choices for Wall Repairs and Mounting

    Wall mounting projects demand specific hardware choices based on the items you’re hanging. Lightweight objects like picture frames may need simple screws, but heavier items require specialized anchors.

    The most secure method involves screwing brackets directly into wall studs. However, positioning often prevents this approach. Modern buildings may have metal studs instead of wood.

    E-Z Anchors provide excellent holding power for various jobs. These plastic bolts insert into wallboard. A metal screw then splits the anchor’s end inside the wall like a fish hook.

    For heavier applications, use the 75-pound rated version costing around $15. These require slightly larger holes but handle substantial weight. Metal E-Z Anchors at $19 work best for hard wallboard or wooden studs.

    The heaviest objects demand toggle bolts. These offer exceptional strength for televisions and loaded shelves. The downside involves drilling half-inch holes in your wall.

    Proper installation ensures mounted items stay secure. Use the right drill and quality screws. Locate studs typically spaced 16 inches apart along a straight line.

    This prevents mounted objects from crashing down feet later. Having the correct hardware makes your wall projects successful and safe.

    Selecting the Right Fasteners for Your Projects

    Choosing the correct fastener makes the difference between professional results and frustrating failures. These small components—screws, nails, bolts, and anchors—form the consumable part of your collection. You’ll need to replenish them as you tackle various tasks.

    Understanding the distinction between screws and nails helps you select the right option. Screws offer superior holding power and easy removal when needed. Nails work better for quick assembly and certain structural applications.

    Fasteners come in numerous sizes measured by length and diameter. Having a variety of common sizes prevents forcing inappropriate hardware into your projects. This protects both your materials and your finished work.

    Different screw types serve specific purposes:

    • Wood screws for furniture and woodworking
    • Machine screws for appliances and mechanical assemblies
    • Sheet metal screws for ductwork and metal fixtures
    • Drywall screws for wallboard installation

    Nails also vary by application. Finishing nails create nearly invisible connections in trim work. Common nails handle general construction needs. Brad nails work perfectly for delicate applications.

    Many common tasks require specific fastener sizes. Cabinet hardware typically uses #8 screws. Picture hanging might need anything from small finishing nails to substantial wall anchors.

    Building a basic collection prepares you for spontaneous projects. Include 1-inch, 1.5-inch, and 2-inch screws in common gauges. Add assorted nails to cover most immediate needs.

    Entry-Level Toolkits for Homeowners

    Our hands-on testing identified clear winners in the entry-level equipment category. After 80 hours researching nearly 85 different tool kit options and testing 11 collections, we found standout choices for basic household needs.

    Home Depot’s Anvil Homeowner’s Tool Set emerged as the top recommendation. This set includes all fundamental items without useless filler that inflates tools counts. It provides a hammer, tape measure, utility knife, screwdrivers, and hex wrenches.

    The Anvil kit features one of the best adjustable wrenches we tested. Its compact case makes storage convenient for apartments or dorm rooms. This collection offers satisfying value and should last years for occasional tasks.

    If the Anvil is unavailable, consider the WorkPro W009021A 100-Piece Kitchen Drawer Tool Kit. It contains nearly identical tools in a nice zippered case. However, it only includes metric hex wrenches and lacks wide-jaw pliers.

    These entry-level tool kit options serve homeowners needing basic equipment. They provide a solid foundation without professional-grade investment. Both include adequate tape for marking and light bundling tasks around the home.

    Upgrading to Higher-Quality Individual Tools

    There’s a noticeable void in the market between beginner kits and professional-grade collections. Unfortunately, few pre-assembled options serve serious DIY enthusiasts well. This gap leaves ambitious fixers with limited choices.

    When you’re ready for consistent, long-term use, purchasing individual tools provides better value. Building your collection piece by piece creates a permanent set with superior performance. This approach beats even the best entry-level kits.

    Start your upgrade path with three frequently used items. A quality hammer should feel balanced and comfortable in your hand. A reliable screwdriver set needs hardened tips that resist stripping. An accurate tape measure requires a sturdy blade that doesn’t bend easily.

    Premium equipment makes projects more enjoyable. A better hammer delivers strike force with less effort. Superior screwdrivers use better steel that resists wear. An upgraded tape measure provides clearer markings and robust locking.

    After establishing this foundation, continue building your collection. Consider upgrading an adjustable wrench for versatile fastening tasks. A sharp utility knife handles precise cutting needs. Dependable pliers offer crucial gripping power.

    Investing in individual tools creates a collection that improves your experience. Better equipment leads to more professional results. You’ll avoid struggling with inadequate entry-level options.

    Tool Storage and Organization Solutions

    A well-designed storage system transforms how you approach maintenance tasks around your living space. Proper organization protects your investment and keeps everything accessible for urgent fixes. Your equipment stays in better condition when stored correctly.

    Traditional metal toolbox options offer excellent durability with compartmentalized trays. They separate small items like screws from larger tools. Modern soft-sided bags provide superior portability for moving your kit between rooms.

    Wall-mounted pegboard systems maximize garage or workshop storage. They keep frequently used equipment visible and within easy reach. Drawer organizers create designated spaces for each tool in your collection.

    Choose storage that matches your home situation and usage patterns. Portable solutions work best for projects throughout the house. Stationary systems suit dedicated work areas with ample space.

    Well-organized storage extends equipment life by preventing rust and damage. It saves time by eliminating frustrating searches for the right handle. Your complete set remains ready for any task around your home.

    Diving into DIY Home Repair Projects

    The transition from buying equipment to actually using it for projects marks an important milestone. DIY tasks range from simple cabinet adjustments to complex light fixture installations.

    Starting with straightforward work builds confidence and familiarity. Furniture assembly represents one of the most common DIY challenges homeowners face.

    Basic screwdrivers and hex wrenches handle most furniture projects. Minor plumbing repairs like faucet washers become manageable with practice.

    Each completed task expands your capabilities. Picture hanging teaches wall stud location and proper anchoring techniques.

    The utility knife proves invaluable across virtually all DIY endeavors. It opens packaging and makes precise material adjustments.

    This approach saves substantial money on professional labor. It also provides personal satisfaction from maintaining your living space.

    Document projects with photos before disassembly. Careful hardware organization prevents frustrating missing pieces during furniture and plumbing work.

    Cost Considerations and Budgeting Tips

    Budget planning for your equipment collection requires smart decision-making. You face a fundamental choice between immediate affordability and long-term value. This decision impacts both your wallet and your project outcomes.

    Entry-level tool kit options typically cost $30 to $100. They provide adequate equipment for occasional fixes. This approach keeps initial costs manageable for new homeowners.

    Higher-quality individual tools cost more upfront but deliver better performance. A premium hammer might run $25-40, while a quality screwdriver set costs $30-60. These investments pay dividends over time through superior durability.

    Consider your actual usage patterns when budgeting. Frequent projects justify investing in better equipment upfront. This strategy saves money by avoiding replacement costs.

    Focus your budget on the projects you actually face. Don’t spend money on specialized equipment for hypothetical needs. Prioritize the tools you’ll use regularly.

    Watch for sales and promotions at major retailers. Strategic timing can make quality individual tools more affordable. Holiday deals often provide significant savings.

    The true cost of inadequate equipment includes more than just replacement expenses. It involves wasted time struggling with poor performance. Project failures might require professional intervention.

    For many people, a hybrid approach works best:

    • Start with an affordable complete kit for immediate needs
    • Gradually upgrade your most-used tools to higher-quality versions
    • Focus on three to five frequently used items first

    Quality equipment retains value and can become lifetime investments. Cheap tools often break during challenging applications. They typically end up in landfills rather than being passed along.

    Maintenance and Safety for Your Tools

    Taking care of your equipment and working safely are just as important as having the right implements for the job. Proper maintenance ensures your collection lasts longer and performs better.

    Safety begins with using each item for its intended purpose. Always wear protective gear like glasses and gloves during projects. This prevents injuries and makes your work more comfortable.

    Keep cutting tools sharp, especially your utility knife. Dull blades require more force and can slip. Store equipment properly to prevent rust and damage.

    Regular maintenance extends tool life and ensures safety. Inspect items before each use for cracks or damage. Tighten loose parts and replace worn components promptly.

    Maintain proper body position when using hand tools. Keep your hands behind cutting edges and use controlled force. Know when a project requires professional help.

    Create a clean, well-lit work area free of hazards. Teach household members basic safety rules. This protects both people and your valuable equipment collection.

    Modern Innovations in Home Repair Tools

    Recent developments in battery technology and digital interfaces have revolutionized common household maintenance. Cordless drill/drivers now offer impressive power and versatility that save significant time on various projects.

    Today’s cordless drill models maintain consistent performance throughout their charge. Rapid charging capabilities get your equipment back in service quickly when needed.

    Laser level devices project perfectly straight lines across walls. This innovation eliminates the tedious process of repeated measurements with traditional bubble levels.

    Digital tape measures combine traditional measuring with electronic calculation. They can store measurements in memory and compute area or volume for complex tasks.

    Many modern tools now integrate LED work lights that illuminate precise work areas. This reduces eye strain and improves accuracy during detailed cutting or fastening.

    Safety features have also evolved significantly. Some utility knife models feature tool-free blade changes and automatic retraction mechanisms. These innovations reduce injury risk during rushed projects.

    Smart tool options with Bluetooth connectivity guide users through projects. However, these advanced features add cost and complexity that many users don’t actually need.

    While these innovations offer genuine improvements, they increase equipment costs substantially. A basic cordless drill typically runs $50-80, while premium models can exceed $150.

    Evaluate whether modern innovations address limitations you actually experience. Focus your budget on improvements that genuinely enhance your specific project outcomes rather than purchasing technology for its own sake.

    Conclusion

    The path to DIY confidence starts with assembling the right collection for your specific situation. Building an effective set requires balancing immediate needs with long-term value.

    Your journey from first-time homeowner to capable DIY enthusiast happens gradually. Even entry-level equipment serves an important purpose while you determine which items deserve upgrades.

    Focus on the fundamentals like screwdrivers, a reliable wrench, and versatile pliers. A good starter tool kit provides a clear starting line for handling common household tasks.

    Your house and lifestyle determine your exact needs. Success comes from having appropriate equipment in the right sizes rather than owning every possible variety.

    This guide has laid the foundation. Now begin building your collection and discover the satisfaction of maintaining your living space through your own capable handle.

    FAQ

    What are the absolute must-have items for a beginner’s tool kit?

    A solid starter set should include a claw hammer, a set of screwdrivers (both flat-head and Phillips), an adjustable wrench, locking pliers like Vise-Grip, a tape measure, and a utility knife. These basic hand tools cover a wide variety of common tasks around the house.

    Is a power drill necessary for basic home maintenance?

    Yes, a cordless power drill is incredibly useful. It speeds up work like assembling furniture, hanging shelves, and drilling holes for wall anchors. A basic model from a brand like DeWalt or Makita is a great investment for any homeowner.

    How do I choose a good tape measure?

    Look for a 25-foot tape measure with a sturdy, wide blade that stays rigid when extended. A standout feature and a clear, easy-to-read line are important. Stanley FatMax tapes are a popular choice for their durability.

    What’s the difference between a basic and a high-quality tool set?

    Higher-quality tools, from brands like Craftsman or Klein Tools, often feature better materials, more comfortable handles, and more precise machining. They last longer and perform better, making tough jobs easier on your hands.

    What safety gear should I have for DIY projects?

    Always wear safety glasses to protect your eyes from debris. For work that creates dust, a simple dust mask is wise. When using loud power tools, hearing protection is recommended to safeguard your hearing over time.

    How should I store my tools to keep them in good condition?

    Keeping your toolbox organized prevents damage. A sturdy tool bag or a small chest protects your items from moisture and keeps them from knocking against each other. This organization also saves you time on your next project.

    Are combination tool kits a good value for a new homeowner?

    A combination kit that includes a drill, driver, saw, and other power tools from a brand like Ryobi can be an excellent value. These sets provide a versatile collection for many different tasks at a lower cost than buying each piece separately.